背景
在前两篇博客里去改了改nezha探针,在改完之后,需要打不通的二进制,出不同的包,但是nezha项目有一个特殊的点,依赖了sqlite,而sqlite又依赖了cgo,此外,Docker版本是使用的一个最小镜像来运行的,并没有什么动态库可以依赖,这就要求:
- 二进制必须是跨版本的
- 二进制必须是静态编译的,没有外部依赖
Golang跨操作系统静态编译
在打跨版本的docker镜像前,需要先编译出不同架构的二进制,在Golang里是支持交叉编译的,首先可以指定GOOS和GOARCH这两个参数来完成。
注意:上面能够完成的基础是没有 cgo依赖
非静态编译
package main

import (
	"fmt"
	"net/http"
)

func main() {
	http.HandleFunc("/api/dashboard/char", chartHandler)
	http.Handle("/hello", http.HandlerFunc(helloHandler))

	fmt.Println("Server listening on port 8080...")
	http.ListenAndServe(":9090", nil)
}

func helloHandler(w http.ResponseWriter, r *http.Request) {
	fmt.Fprintln(w, "Hello, World!")
}

func chartHandler(w http.ResponseWriter, r *http.Request) {
	fmt.Fprintln(w, "[10, 20, 30, 40, 50, 60]")
}
- 本架构编译
go build -o test .
查看生成的二进制,存在动态库依赖
root@lvgj-db:~/code/test# ldd test
	linux-vdso.so.1 (0x00007ffcac74a000)
	libresolv.so.2 => /lib/x86_64-linux-gnu/libresolv.so.2 (0x00007fbe038c8000)
	libpthread.so.0 => /lib/x86_64-linux-gnu/libpthread.so.0 (0x00007fbe038a5000)
	libc.so.6 => /lib/x86_64-linux-gnu/libc.so.6 (0x00007fbe036b3000)
	/lib64/ld-linux-x86-64.so.2 (0x00007fbe038ec000)
- 跨架构交叉编译,通过GOOS和GOARCH交叉编译
GOOS=linux GOARCH=arm64 go build -o test-arm64 .
静态编译
无cgo依赖
指定CGO_ENABLED=0
CGO_ENABLED=0 go build -o test .
查看是否有依赖:
root@lvgj-db:~/code/test# ldd test
	not a dynamic executable
便可以直接运行
有cgo依赖
如果有cgo依赖,以哪吒为例,通过指定CGO_ENABLED=0虽然是静态编译,但是有nezha -> sqlite -> cgo,直接运行会有以下错误:
Feb 02 15:59:50 v-ps-15o app[523025]: [error] failed to initialize database, got error Binary was compiled with 'CGO_ENABLED=0', go-sqlite3 requires cgo to work. This is a stub
Feb 02 15:59:50 v-ps-15o app[523025]: panic: Binary was compiled with 'CGO_ENABLED=0', go-sqlite3 requires cgo to work. This is a stub
此时需要CGO_ENABLED=1,并且还有静态编译,此时需要通过ldflags指定静态编译
CGO_ENABLED=1 GOOS=linux GOARCH=amd64 go build -ldflags '-linkmode "external" -extldflags "-static"' -o ./dist/dashboard-linux-amd64 ./cmd/dashboard
此时才是完美的静态编译
Docker 跨版本镜像
安装基础配置
安装qemu-user-static,qemu-user-static用来模拟多平台环境,它依赖于binfmt-support,所以这两者都要安装。
sudo apt install -y qemu-user-static binfmt-support
docker run --rm --privileged multiarch/qemu-user-static --reset -p yes
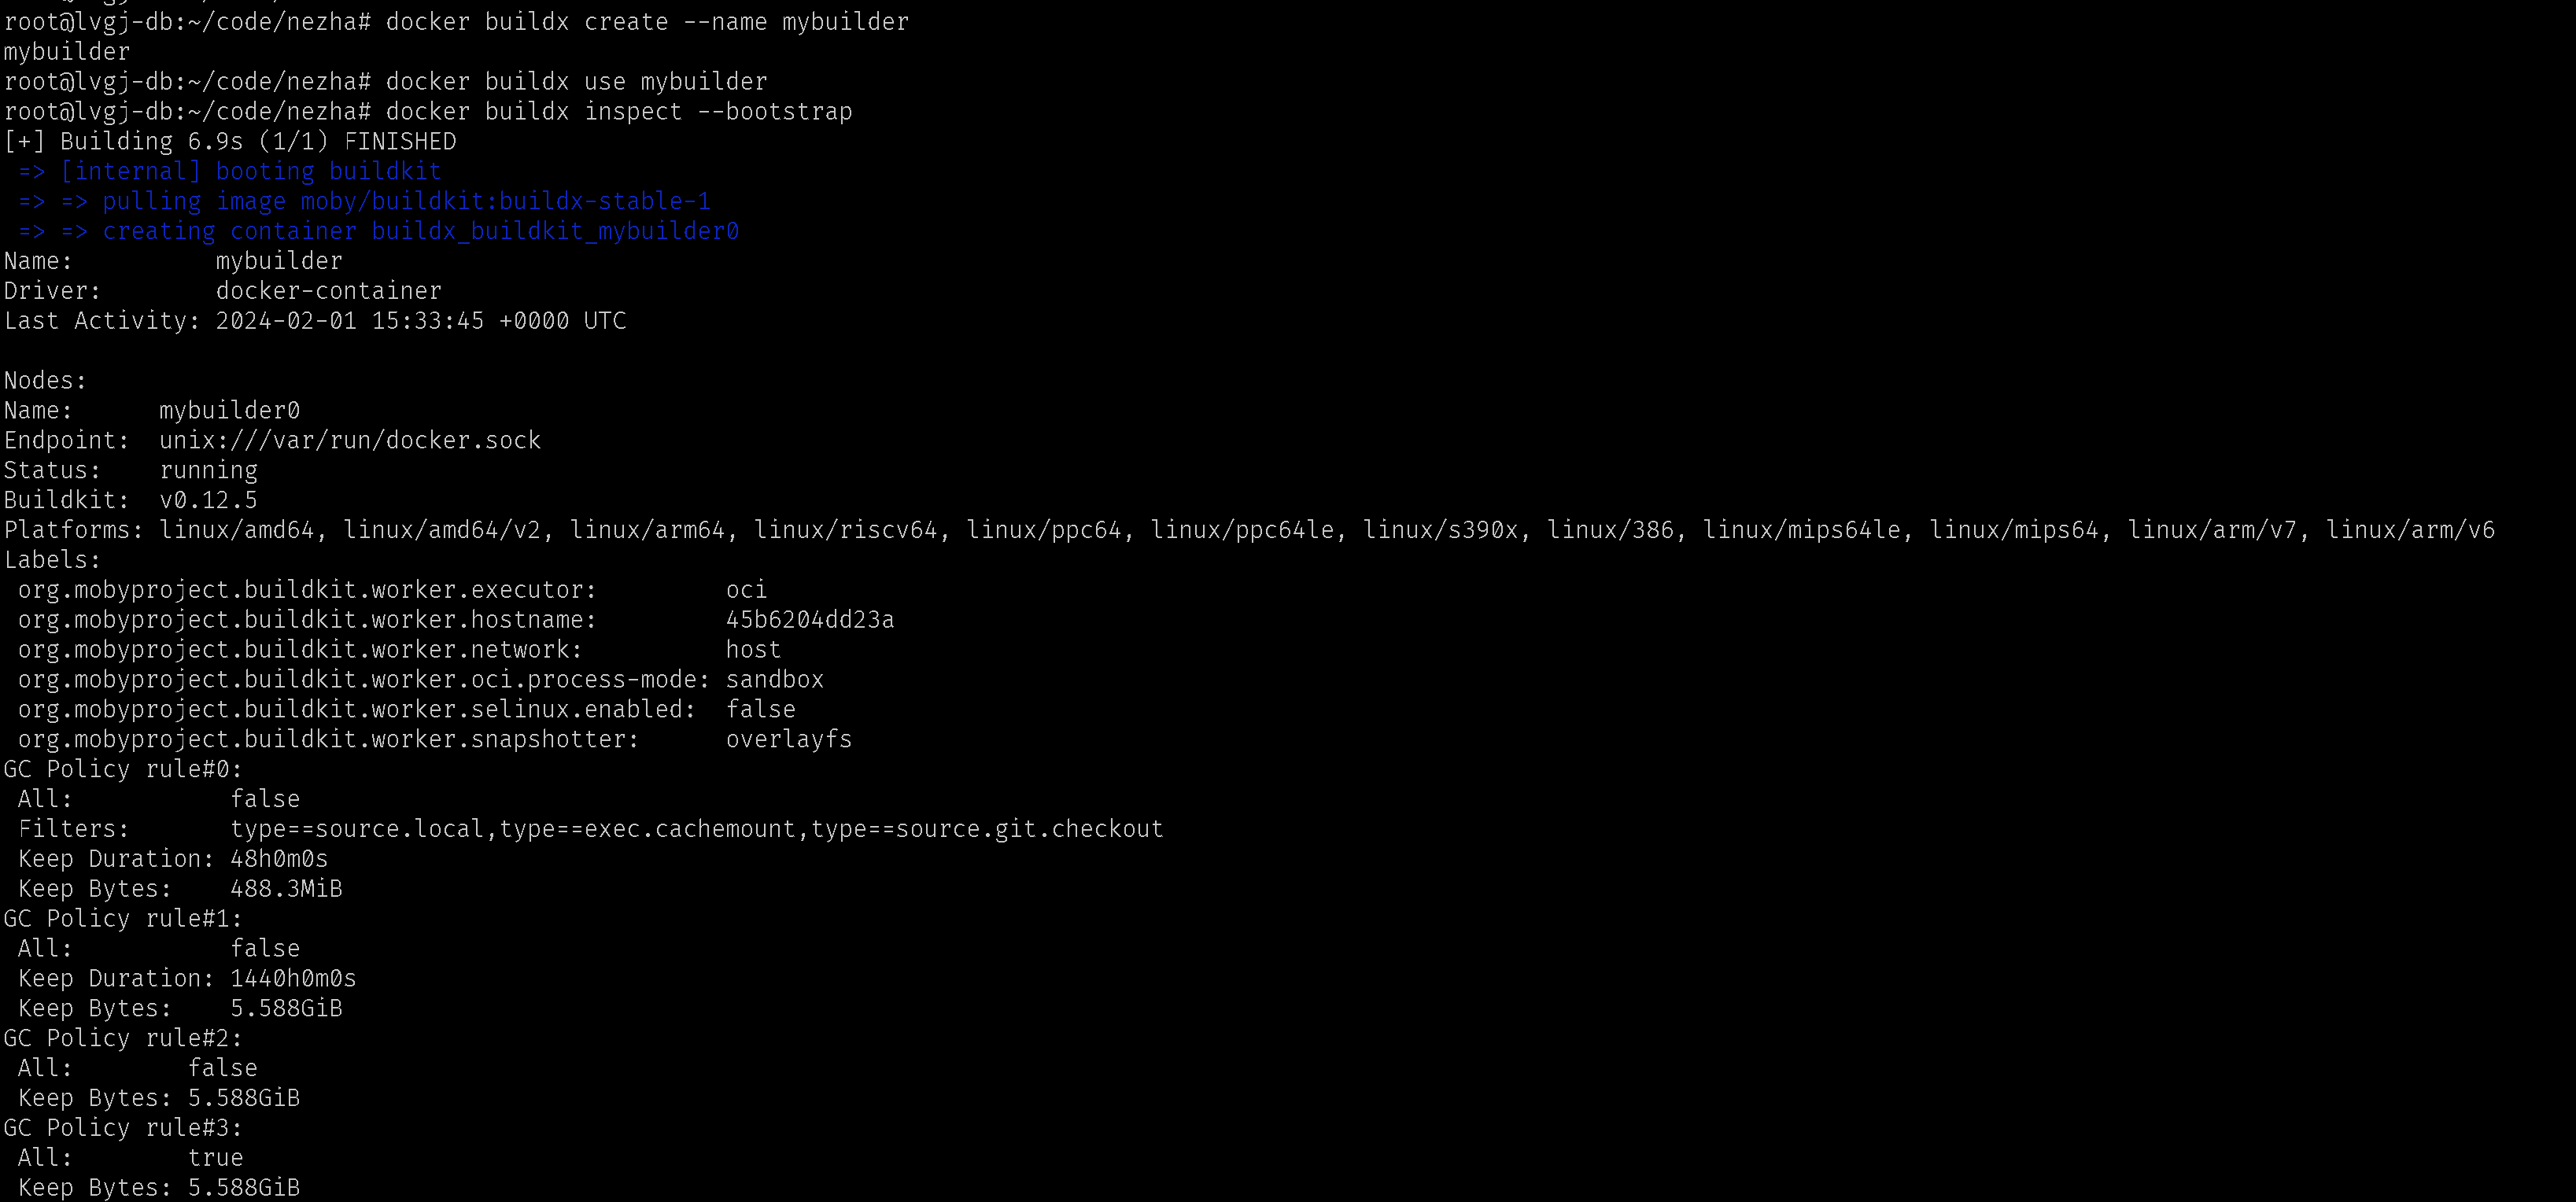
创建buildx容器
#创建构建容器

docker buildx create --name mybuilder

#buildx使用构建容器

docker buildx use mybuilder

#初始化构建容器

docker buildx inspect --bootstrap
构建镜像
以nezha的Dockerfile举例,区别在于COPY,会根据不同操作系统COPY不同的二进制
# latest 镜像还没有 riscv64 https://hub.docker.com/_/alpine/tagsFROM alpine:edge

ARG TARGETOS
ARG TARGETARCH

RUN apk update && \
apk upgrade --no-cache && \
apk add --no-cache tzdata && \
cp /usr/share/zoneinfo/Asia/Shanghai /etc/localtime && \
echo 'Asia/Shanghai' >/etc/timezone && \
rm -rf /var/cache/apk/*

COPY ./script/entrypoint.sh /entrypoint.sh
RUN chmod +x /entrypoint.sh

WORKDIR /dashboard
COPY dist/dashboard-${TARGETOS}-${TARGETARCH} ./app

VOLUME ["/dashboard/data"]
EXPOSE 80 5555
ENTRYPOINT ["/entrypoint.sh"]
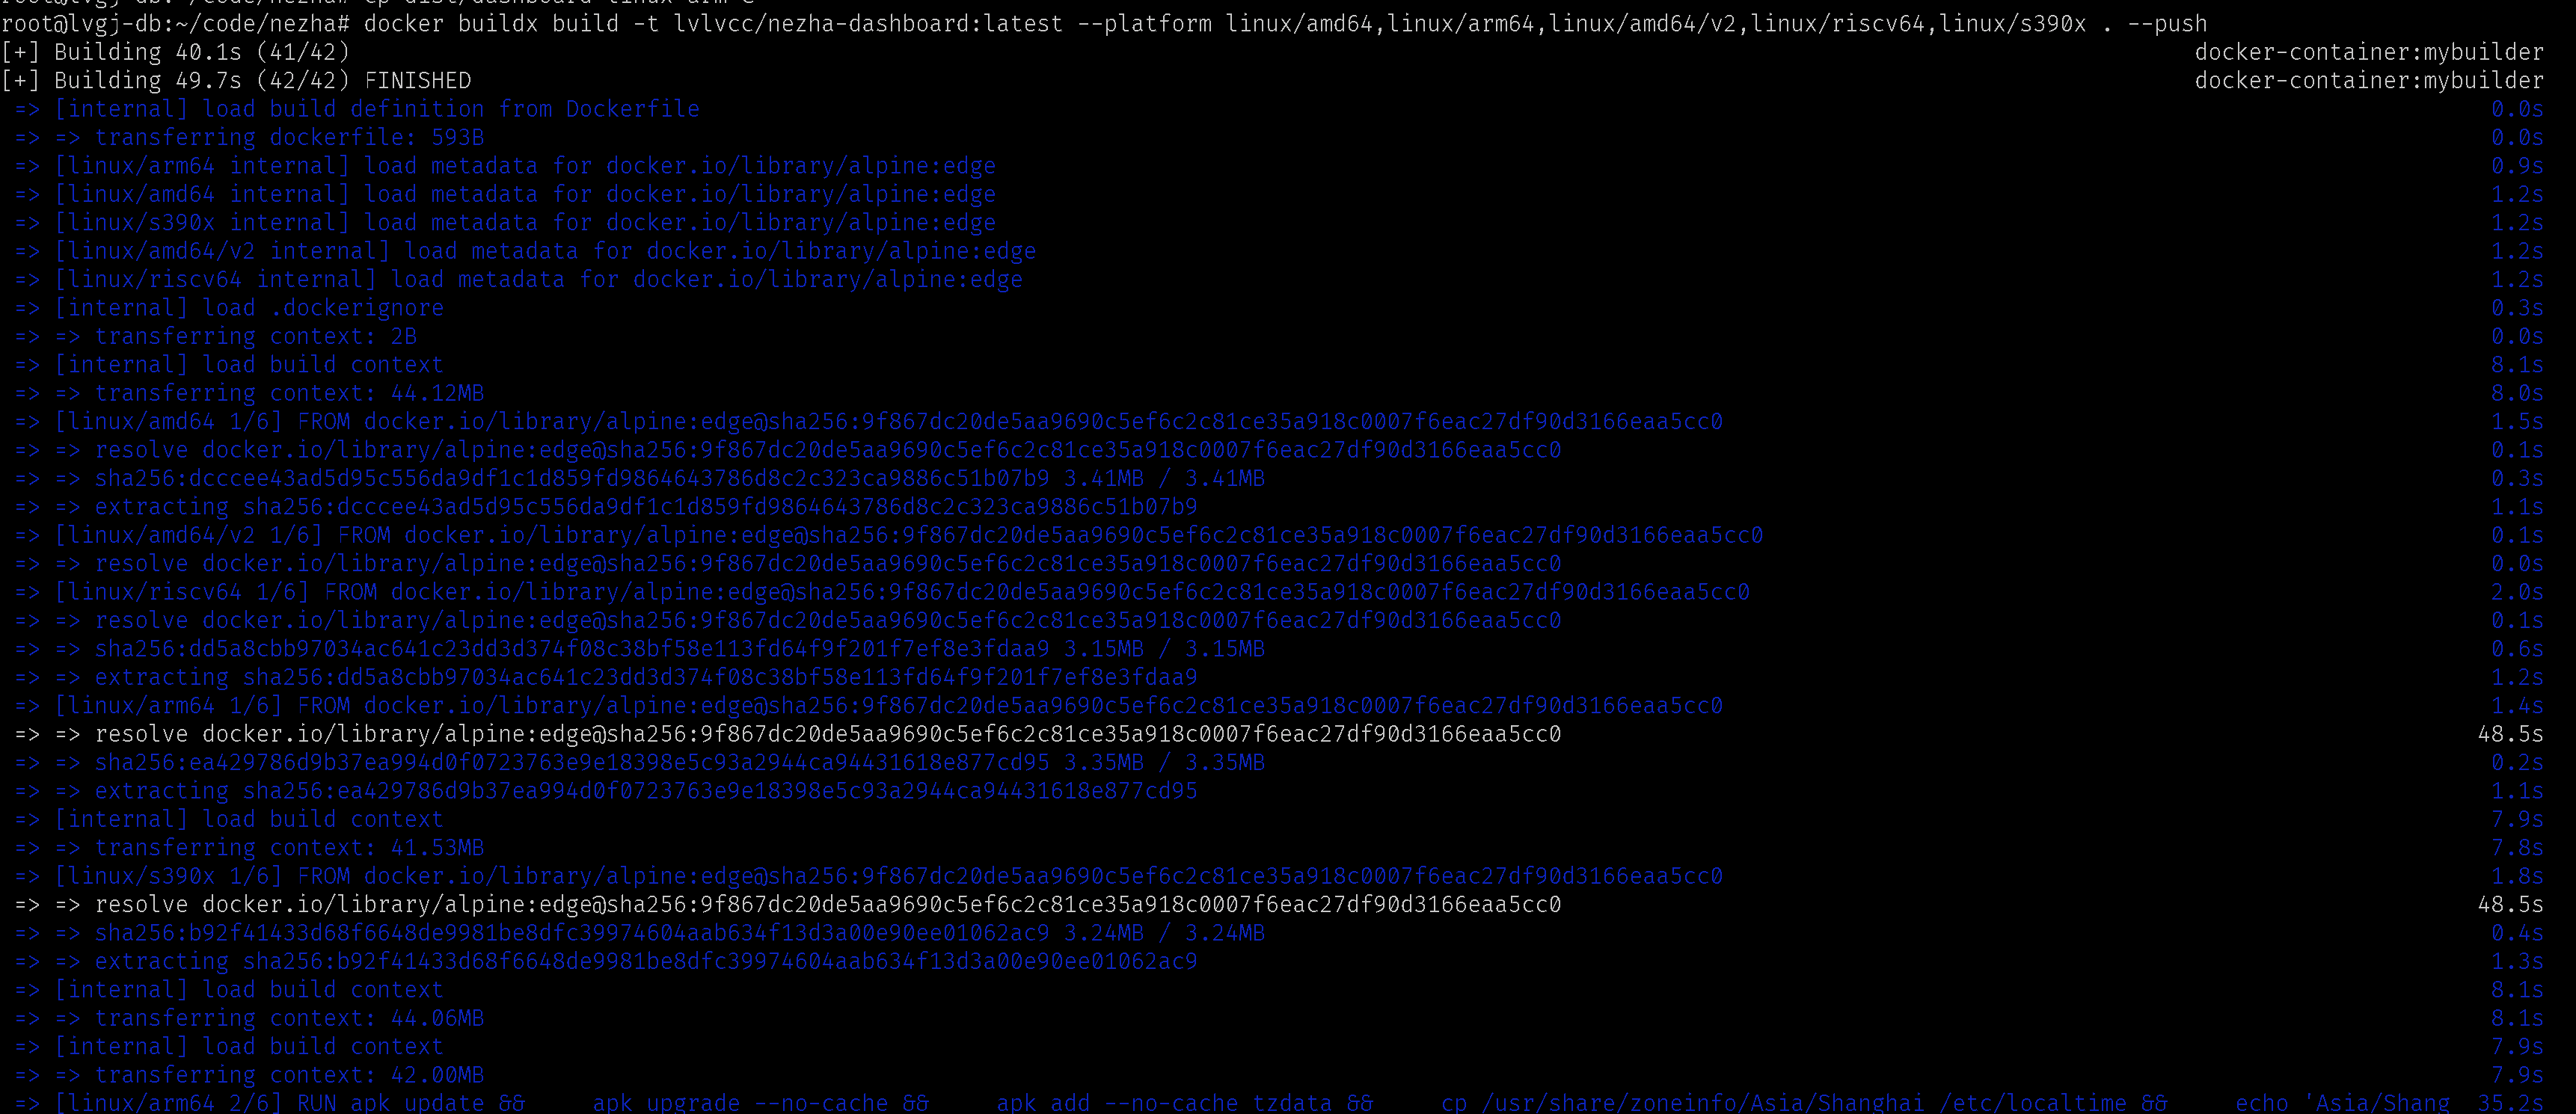
build指令:
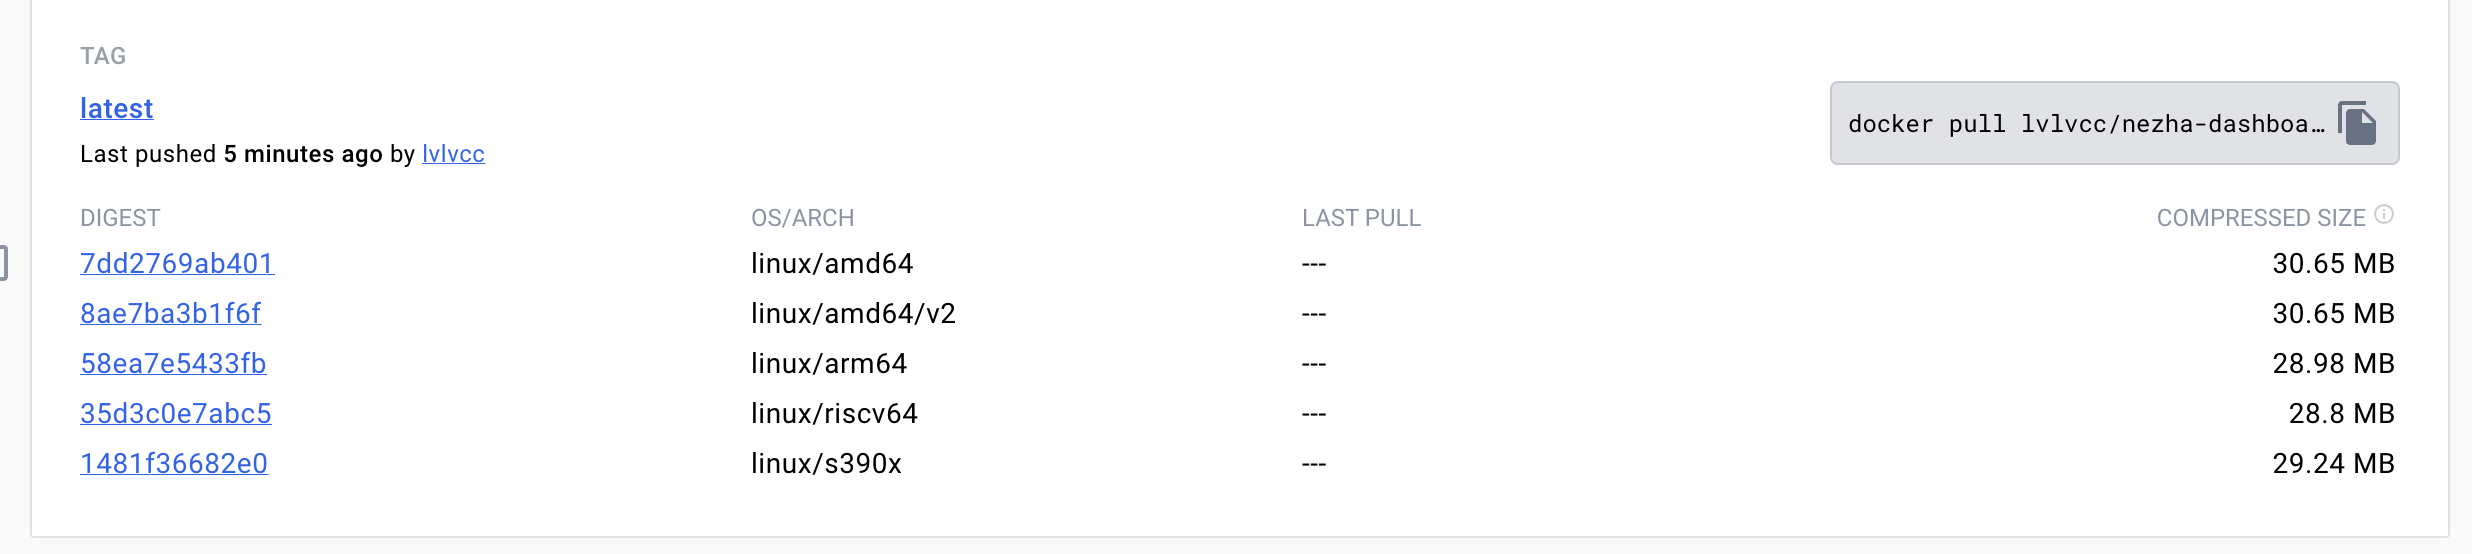
docker buildx build -t lvlvcc/nezha-dashboard:latest --platform linux/amd64,linux/arm64,linux/amd64/v2,linux/riscv64,linux/s390x . --push
结果
在DockerHub平台可以看到支持的操作系统有多个